
Get started
Create shifts and schedules
Save a shift once, then put it on the calendar for the people and dates it covers.
Before you start
Add your staff first, because every schedule belongs to a named person.
Schedules are what Timekeep measures attendance against. Late minutes, undertime and overtime all come from the gap between the schedule and the clock-ins. A day with no schedule records none of them.
Steps
Create the shift
-
Go to Shifts and click Create Shift.
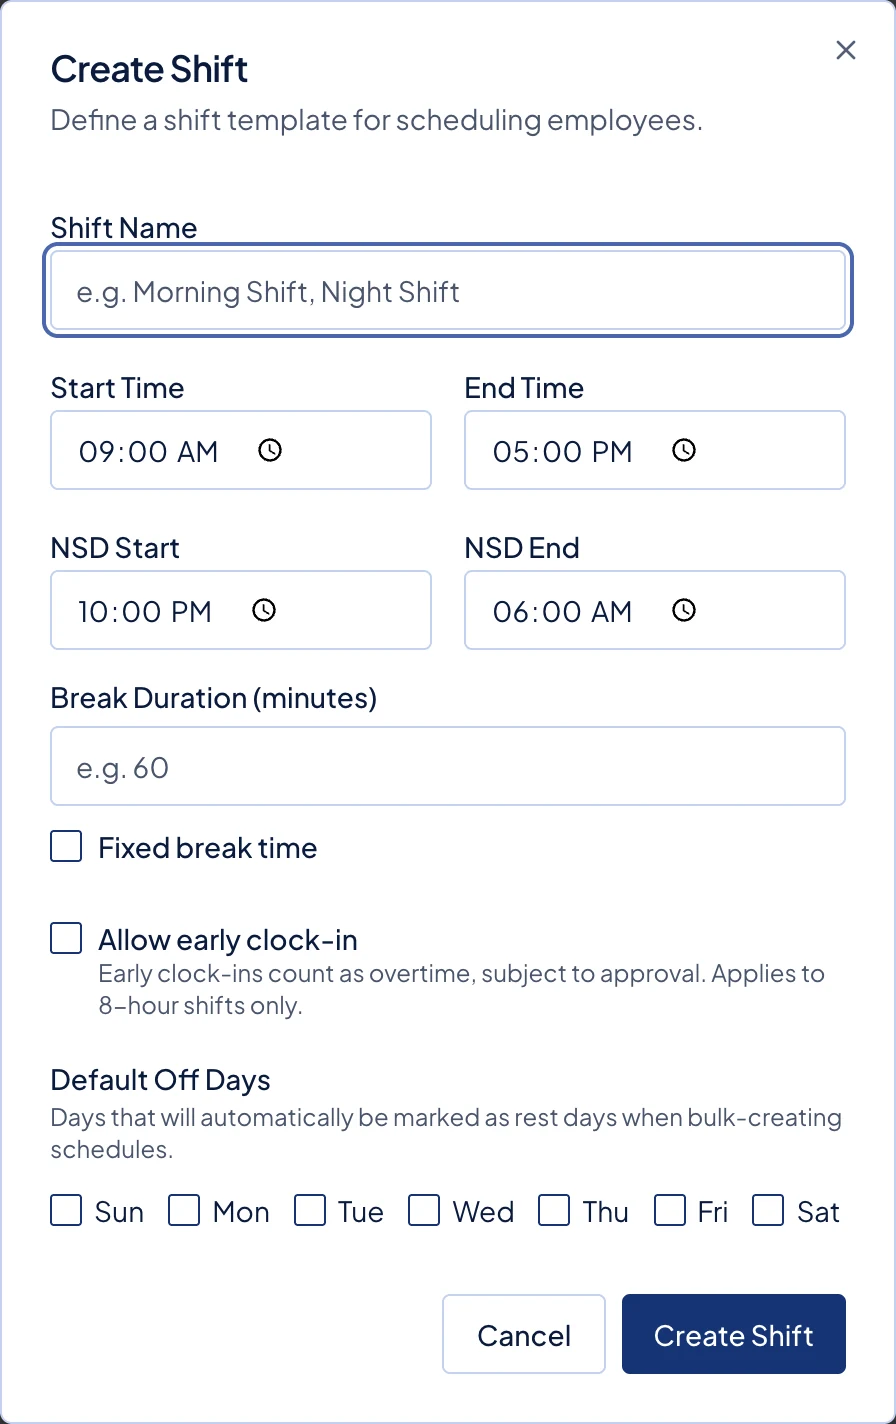
The Create Shift dialog. -
Enter a Shift Name, such as Morning Shift.
-
Set Start Time and End Time. For a night shift that runs past midnight, set an end time earlier than the start time. The list then tags the shift Overnight.
-
NSD Start and NSD End hold the night differential hours, the night stretch that earns extra pay. Leave them alone unless your hours differ.
-
Enter Break Duration (minutes) for an unpaid break, such as 60 for a one-hour lunch. If the break is always at the same time, tick Fixed break time and set Break start and Break end. The duration is worked out for you.
-
Leave Allow early clock-in off unless clocking in early should count as overtime. That overtime still needs approval, and the setting applies to 8-hour shifts only.
-
Under Default Off Days, tick the weekdays that are rest days. Timekeep applies them when you schedule a date range, so those days come in as rest days.
-
Click Create Shift.
Put it on the calendar
-
Go to Schedules and click Add Schedule. Clicking an empty calendar cell opens the same form with that date filled in. The week and day views fill in the person too.
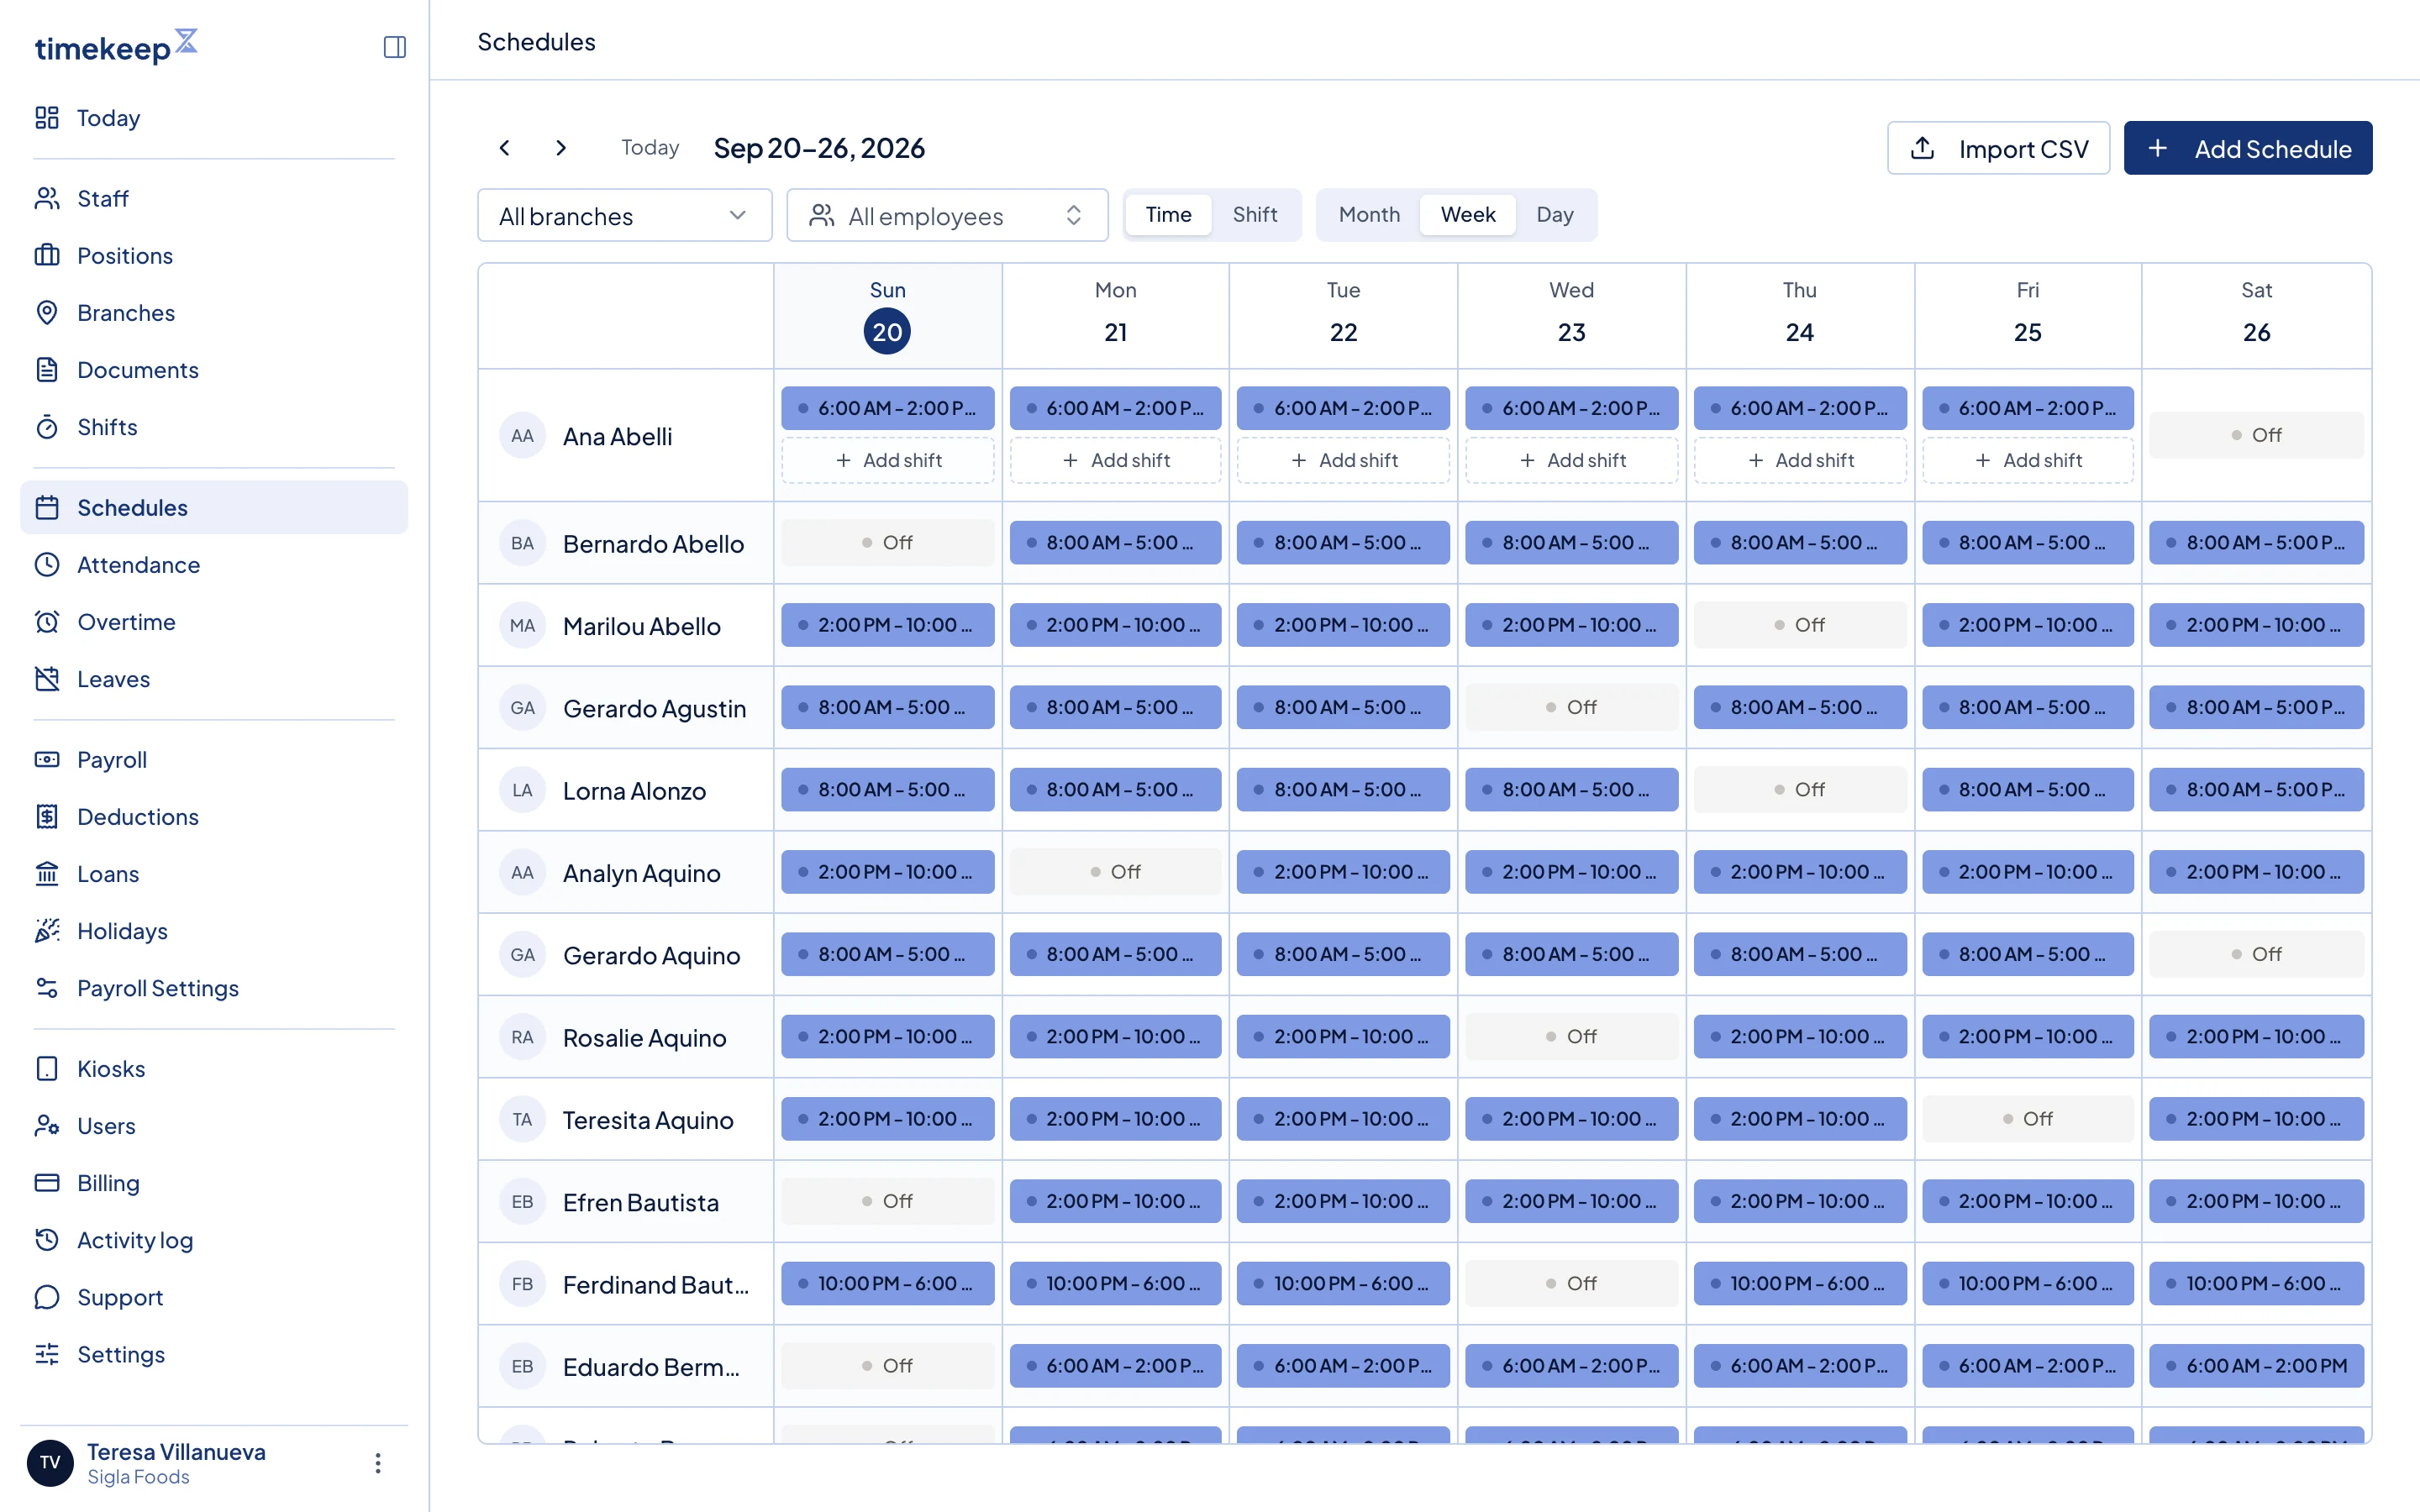
The Schedules calendar. Add Schedule is at the top right. -
Tick the people under Employees, or use Select all.
-
Choose your shift under Shift Template. The times, break and off days are copied in, and you can still change them here.
-
Set Start Date and End Date. One date schedules one day. A range schedules every day in it, and the weekdays picked under Off Days become rest days instead.
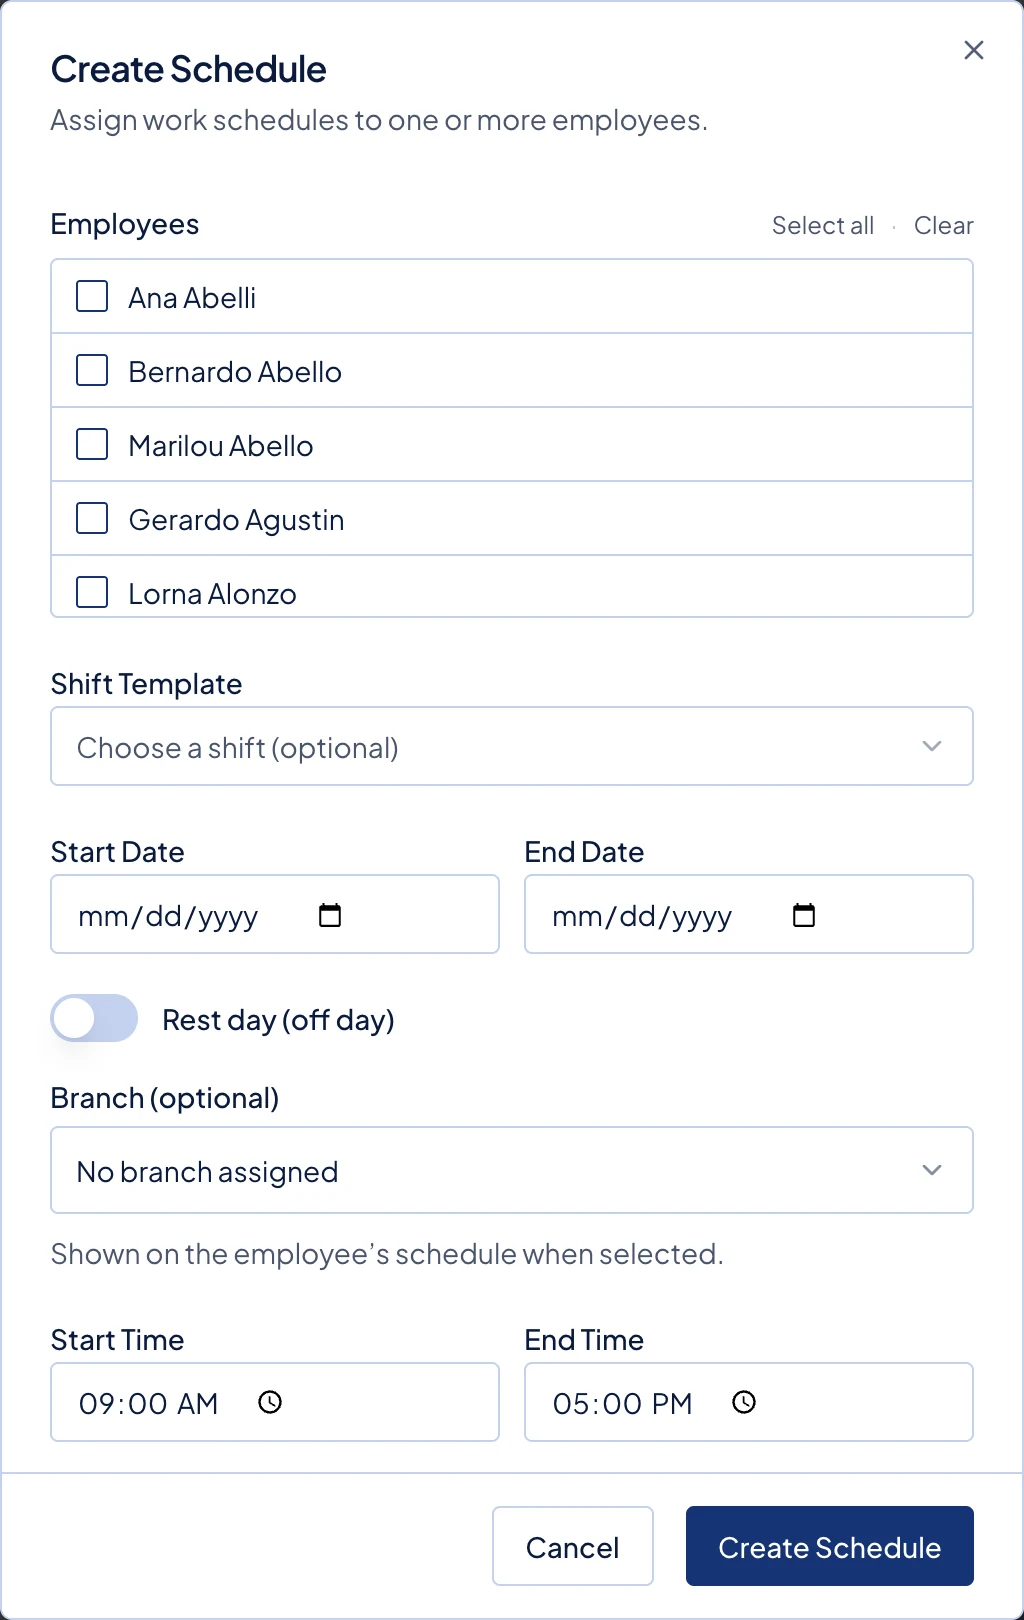
The Create Schedule dialog, opened from Add Schedule. -
Click the create button, which counts the schedules it will make.
Or import a schedule
Use a file when you are scheduling many people at once.
- On Schedules, click Import CSV, then Download Template.
- Fill in one row for each person for each day, using these columns: Employee Number or Email, Date, Start Time, End Time, Break Duration, Off Day.
- Upload the file, check the preview, then click the import button.
What happens next
Each schedule appears on the calendar. If attendance was already recorded for those dates, Timekeep works it out again against the new times and tells you how many records changed when any did.
Common problems
- One day needs to be a rest day. Turn on Rest day (off day), and the time fields disappear.
- Nobody is listed under Employees. A branch filter is probably hiding them. Clear the Branch filter, or set a home branch on your staff.
- You changed a shift and the calendar stayed the same. Changing a shift does not change schedules already created from it, so edit those days on the calendar.
Last updated Sep 20, 2026